After our first Mt. Hood Picnic attempt was foiled by wind, windsurfers, and stormy weather on the mountain, we decided to reevaluate our route for the swim and also wait for a more solid weather window before trying again. On Sunday evening, we took a gander at the weather forecast for the coming week and determined that both Thursday and Friday were looking promising. Dan volunteered once again to kayak with us during our swim, providing a welcomed safety buffer on what is perhaps the most challenging part of this little adventure.
No other parties were available to provide support, so we decided to do the picnic self-supported with no crew providing any food, water, or aid. This required that we divide our gear into two parts and use two cars, leaving one at Timberline Lodge and leaving the other at the start/finish in Hood River. Also meant that after the first section of biking, where Dan would meet us to say hi at least once before heading home, we had no real bail out options if things went wrong, say at 1am on Highway 35. So it goes.
Getting to the Start.
Thursday morning rolled around and while there was a chance of light rain on the mountain and moderate winds at Hood River, the forecast otherwise looked good. So, we packed up both cars and drove to Timberline Lodge. Unlike last time–when we had Dan in his kayak, a support person in my car, a friend joining us for the climb, and additional friends planning to meet us at the finish–this time felt decidedly low key.
Dropping off Tina's car at Timberline went smoothly. Found a nice parking spot in the overnight area, filled out the permits to avoid thinking about them later, checked the gear one last time, and then drove my car with the bikes atop down to Hood River.
Driving down, we eyed our predetermined break spots and also attempted to get a feel for the road from a biker's perspective: steepness of the grade, thin or non-existent shoulders, rumble strips, places that still had gravel debris from the winter, etc. I still had concerns about biking along the highway at night, but I kept faith that a Thursday night would be reasonably quiet.
Funnily enough, the first 35 miles or so of driving, there was no wind to be seen. The trees were becalmed. That is until we were about 10 miles from Hood River. Ah, there was the wind. Oh, and look! The windsurfers are out! Yay!
We parked near the Hood River bridge and walked up the shore to one of our possible starting spots, a beach at the very end of the Best Western property. Our thought was that with the strong Columbia River current and the Hood River's inflow, our best strategy was to simply start further upstream. Then, when we reached Washington, we would swim upstream prior to crossing so we would have a healthy buffer of space to get back across.
Thinking it over and seeing the waves, we decided to try our second, more conservative starting spot at Koberg Beach, a full mile upstream of the Hood River bridge. This turns out to have been wise choice.

The Swim
We suited up for the swim and Dan drove us over to the Koberg Beach in his car, where we helped him carry his kayak down to the beach. With relatively little fanfare, we put on the rest of our swimming gear, inflated our orange buoys, and got into the water. As with our previous open water swims in the Columbia, we took a minute or two to acclimate to the water temperature and then swam off towards Washington. Our first waypoint for the crossing was the end of a spit that sticks out from the SDS Lumber Company property. After reaching the spit, we would swim around its tip and ultimately land on a sandy beach on the Washington shore.
In only 20 minutes, I reached the spit and was feeling pretty solid. The waves jostled and rolled me a fair bit in the main channel, but after our previous attempt it felt manageable. Simply a matter of timing my strokes and breathing at the right time. Every so often a large wave would catch me, but I simply rolled along with it and kept my mouth shut to avoid swallowing water.
We regrouped at the end of the spit and then slowly swam around the spit checking for boat traffic while avoiding a few large pylons. About 10 minutes later we had navigated the rocks near shore and made landfall. A few photos, a quick snack, and then we were ready to swim back across.
Our endpoint on the return swim was the Best Western beach area, which would give us plenty of space before the Hood River bridge. Since we expected a strong current again, our actual aim was for a tall tree about 500ft upstream from the beach itself.
Tina and I started out together but once we passed beyond the protection of the spit, the waves and current took hold and we both focused on our own swims. Dan was there to watch over us, so we knew someone was keeping an eye on the other person. I think about halfway across is when I realized that the return swim was going to be more of a battle than I had expected. The waves had gotten a bit larger, and it was obvious I was working harder to make forward progress while still being pushed unrelentingly downstream.
Remembering last week's attempt and definitely not wanting to have a repeat, I dug in and just kept swimming. I counted strokes, kicked harder, and kept my sighting breaks as short as possible. The last five hundred feet or so, the current noticeably lessened and the waves got weaker. In what felt like forever (but was only 35 minutes since leaving Washington), I reached the protective log barrier surrounding the hotel's dock and hopped up to check where Tina was.
Tina was a few hundred yards away and swimming close to the bridge, but since Dan was with her I hopped off the log barrier and swam to the dock to finish my swim. Once on the dock, I sat down and took a few seconds to rub out a cramped calf. For a minute or two, I thought I might have to walk off the dock and down the shore to meet Tina, but she pushed hard and made it to the dock only five minutes after me. After a few deep breaths, she hopped onto the dock and our Columbia River swim was complete!

Biking to Timberline
Dan took our victory photo and then piloted his kayak back towards Koberg Beach. Tina and I took a few more selfies and then slowly walked up to the car. The swim had been damn hard and we both mentioned how much we had struggled to get back across. Tina said that if we accomplished no other activity that day, the swim itself had been a solid achievement. I agreed.
There was no stopping at this point though. Instead we took a leisurely hour to peel off our wetsuits, rinse the Columbia off, drink and fuel up, change into our bike kit, do a couple videos, assemble our bikes, and do the final organization of our packs. Right around 6:45pm with Dan watching, we started our bike ride to Timberline Lodge, only 47 miles and 7300 ft of elevation away.

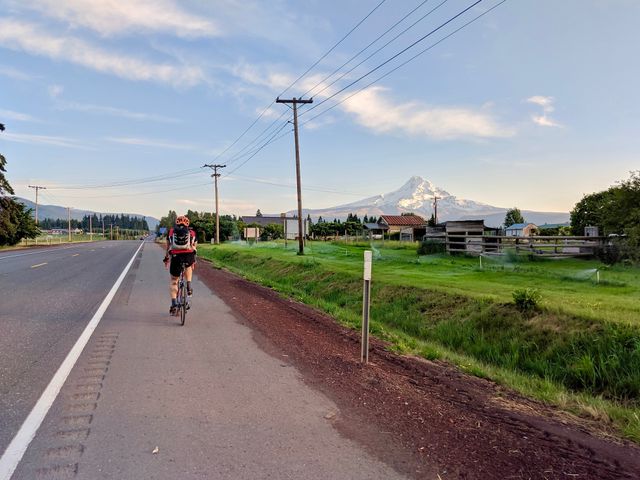
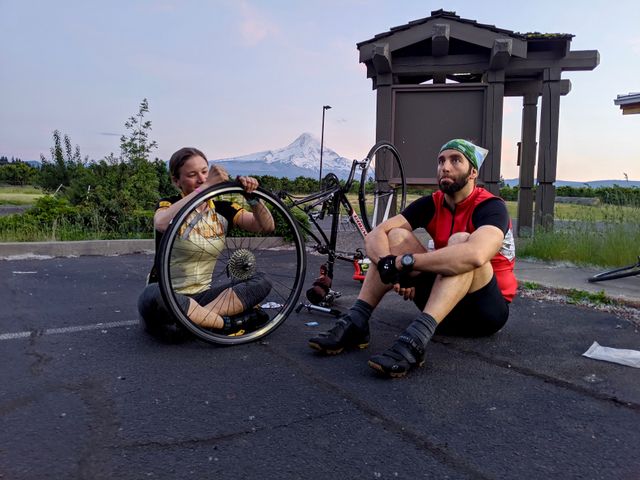
The first hour went smoothly. Our legs warmed up nicely and the climb out of Hood River felt good. Then, right around 8pm, just a minute or so after Tina recorded a video on her bike saying how well things were going, she hit a piece of glass and got a flat. What's even funnier is that we were less than a mile from our first scheduled break spot at the Hood River Ranger Station.
Ladies and Gentlemen, over the next hour and a half, we traveled less than one mile. We replaced her tube with a brand new one and by the time we reached the ranger station, it was losing air. Not in the same spot either. No siree, this new tube got a tiny hole on the opposite site of its valve. Either it had an existing weakness or it got damaged during installation. We first tried to patch this tube but the patch would not hold. So, we patched her original tube and that is the tube she used for the rest of the bike ride.
The sun had set during our little bike maintenance fun, so we put on our bike lights and continued on. Dan promised to meet us at our next break spot at Cooper Spur Rd. just in case we had any further bike tube issues.

The biking at night was simply lovely. The traffic was even lighter than we expected. There was no moon so you could barely see much beyond your front light, which made it so you could not tell how steep the road was or what was too far ahead. You simply biked and kept your eyes on what was immediately in front of you.
We made it to Cooper Spur Rd. in what felt like no time. In fact, we beat Dan there. We grabbed a quick snack, thanked Dan and wished him safe travels home, and continued on our way.
The next segment had a mile section where there was virtually no shoulder and small piles of gravel on the edges. This is the section that concerned me the most during our planning and what encouraged me to buy new, brighter lights to ensure we were as visible as possible to vehicles. The small section went off without a hitch. We were through it in about 7 minutes and not a single vehicle was seen. So much for that.
Our next scheduled break spot was the turn off for Mt. Hood Meadows, but we stopped a couple miles beforehand as it was getting chilly and we both needed to add a top layer. We skipped the Meadows break spot and enjoyed a fast downhill in the dark before stopping again for a quick snack and the adding of a bottom layer and shoe covers.
Up to this point we had seen only a dozen vehicles or so since Cooper Spur Rd. When we reached the junction with Highway 26 and merged onto it, vehicles were on the road almost constantly. It was a bit jarring to go from a dark, quiet highway where I spent most of the ride in the middle of the lane to having trucks zooming past you every minute.
Just after 12:30am we reached the bottom of the Timberline Road and the beginning of our last bike climb of the night. We took a nice fifteen minute break to light up the sign for pictures and fuel up a bit. While the climb up Timberline Road was not bad, we definitely felt tired. We had been going pretty steady for almost 9 hours and had not slept at all. I also think the swim took far more out of us than we expected, which made everything that came after it just that much harder.
The Backcountry Ski
But we made it to Tina's car by 2am and, while tired, we still felt like giving the summit a go. Unfortunately, we were moving a bit slow, so by the time we had eaten our prepared food and drinks, stowed our bike gear, changed into our mountaineering clothes, and organized our gear it was already 3am.
That is a pretty late time to start for a summit climb, especially when you are already dragging. Unfortunately, with the long break after our swim to recover and then the bike flats, we simply were behind schedule and had no time to even take a short nap.
Still. We went up. Just slower than we have ever gone. And, I will be honest, there were multiple times on the way up when I thought I was about to fall asleep on my skis. Just beyond Silcox we agreed that our new goal was the top of Palmer. We were too sleepy and still had a long bike ride back to Hood River ahead of us. Also, it promised to be a bright, sunny day which means lots of sun exposure on the slopes and an increased chance of rock fall higher up on the mountain. Zzzz + meh = nah.
When we reached the top of Palmer, the sun had not yet hit the slopes and, let me tell you, those slopes were pretty darn icy and hard. So, we took a short little nap and waited for the sun to appear and soften up the snow a bit. Even with 30 minutes of sun, the ski down was fairly lousy. Only when we reached a freshly groomed trail below Silcox did we start enjoying ourselves.

Biking to Hood River
Getting back to the car was a nice feeling. All that remained was the bike ride back to Hood River. While it was 47 miles, it was almost entirely downhill and we had oodles of time to do it in. But first, we went into the W'yeast Day lodge and took another long break, where we closed our eyes, ate snacks, and drank fluids.
Just after 9:30am, we were all ready for biking and started the fun descent from Timberline. Brrrrr was that descent chilly with the cold mountain air and shade! Thankfully, we were down in no time and the wind + speed woke us right up.
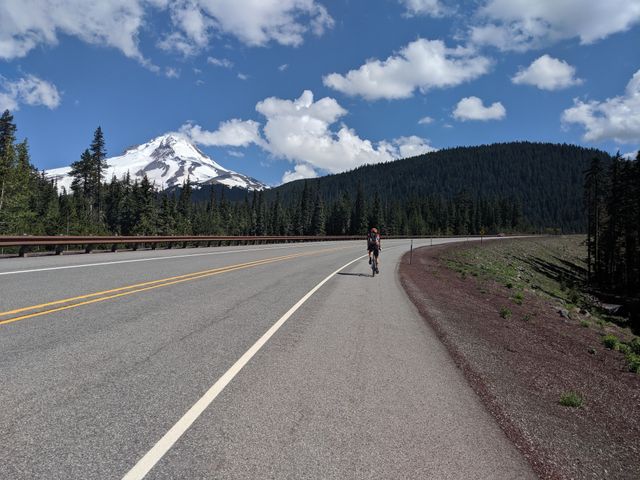
The majority of the bike ride back to Hood River was delightful. It was warm but not hot. There was about 1500 ft of climbing but it was easy to switch to our lower gears and just crank it out. The only exception to this delight was when we approached Hood River, where a headwind made

the flats a bit more effort than we would have liked. Also, our second wind was starting to fade and we were getting sleepy again.
Even with a few pauses for food and photos, we reached the Columbia River in three hours and thus ended our second attempt at the Mt. Hood Picnic.
Epilogue
All said and done, we did 2.1 miles of open water swimming, 94 miles of biking with 8800 ft of elevation gain, and a 2500 ft backcountry ski. That is not too shabby.
However, it is not quite what we planned and that does frustrate me a bit. I would have loved to have gotten that summit too. That was the dream goal and it felt almost within reach.
That swim though, it was really damn hard. There was a distinct moment out there when I thought I might not make it back across to Oregon. Again. Only when I was three quarters of the way across did I know for sure I was going to reach that dock. And then on the bike ride we got three flats, which cost us well over an hour of time. That exhaustion and the loss of time put us in a uncertain position when it came to the climb. The smart choice was to let the summit go and make sure we got home safe.
We are not intending to do a third attempt this year. Honestly, the idea of doing that swim again is unappealing and finding a new goal/project sounds like way more fun. If I ever try to pull off this again, I think starting the swim a few hours earlier would provide a nice cushion for unforeseen issues and allow a possible nap prior to the climb. Also, during this entire adventure, I only had two chocolate covered espresso beans and a cup of tea's worth of caffeine in a sports drink. I think coffee prior to the climb would have been a real game changer too.
We are discussing our next projects right now, so hopefully I will have something cool to share with you soon. Until then, enjoy my Mt. Hood Picnic photos and videos on Flickr.


